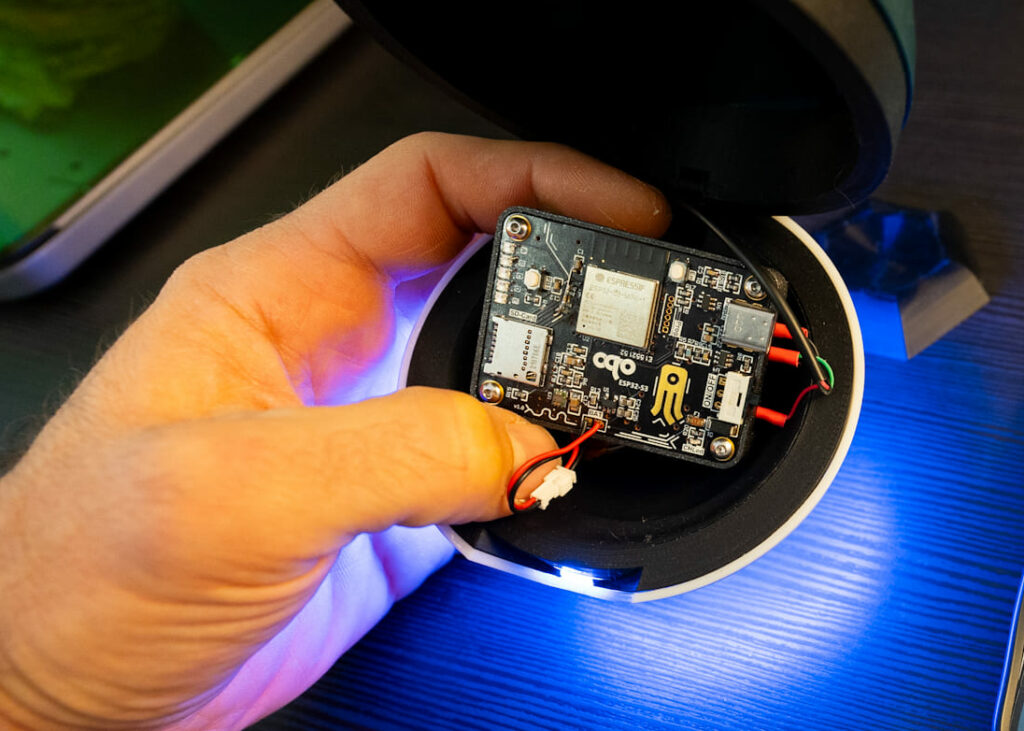
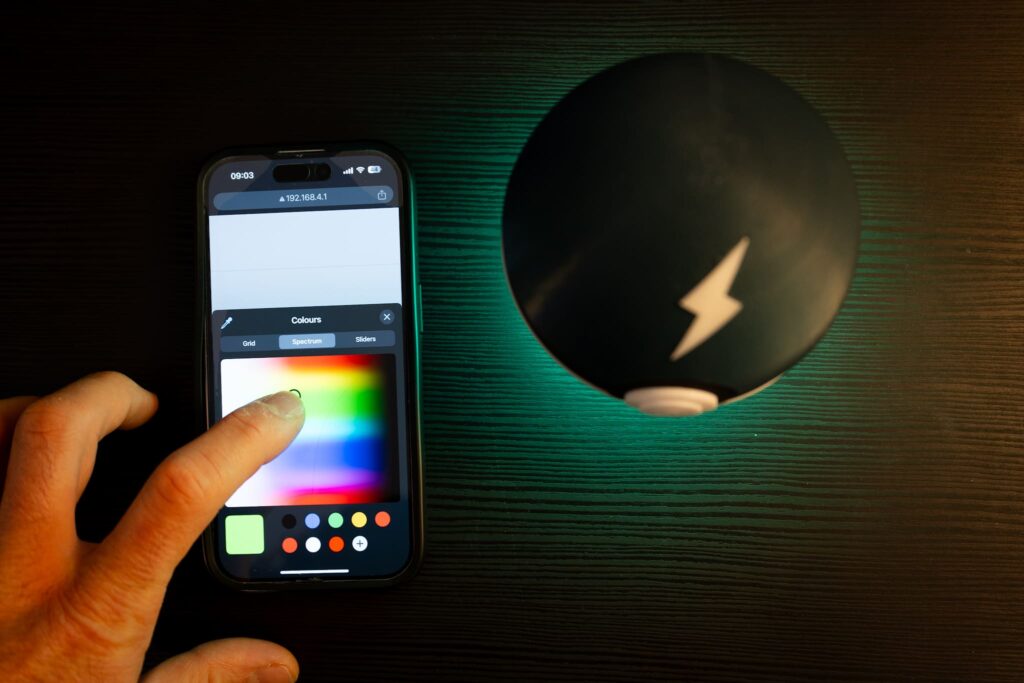
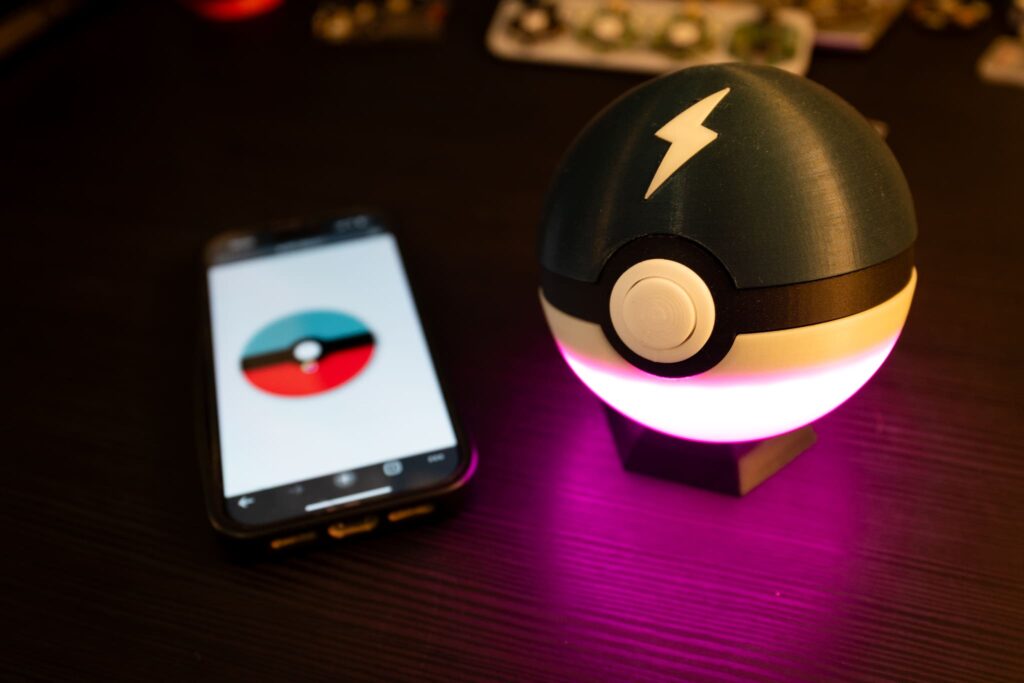
In this third part of the article series on building a WiFi-controlled device with the ESP32-S3, we will explore how to integrate WebSocket functionality into the project. With the groundwork laid in Part 2, where we set up the WiFi connection, access point, and served a web page, we will now enhance the interactivity of our device by enabling real-time communication through WebSockets. This allows the ESP32-S3 to receive and process data from a web interface dynamically.
In this example application I will focus on controlling the color of an LED integrated into the bottom of a Pokéball-shaped device. A color picker on the web page sends the selected color data to the ESP32-S3 in JSON format via a WebSocket. The ESP32-S3 processes the message, extracts the RGB values, and updates the LED color accordingly. This integration highlights how WebSockets can facilitate efficient two-way communication for interactive IoT projects.
You can find the complete code on my GitHub.


Setting Up the WebSocket on ESP32-S3
A WebSocket provides a full-duplex communication channel over a single TCP connection, enabling real-time interaction between a client (e.g., a browser) and a server (e.g., ESP32-S3). Unlike traditional HTTP requests, where the client has to repeatedly poll the server for updates, WebSockets allow both the client and server to send data to each other as events occur, without the overhead of establishing a new connection each time.
For the ESP32-S3, the WebSocket server is implemented using the ESP-IDF framework. Once the server is initialized, it listens for connection requests from clients. When a client establishes a connection, the channel remains open for bidirectional communication. This is ideal for IoT applications where low-latency, real-time interaction is required, such as sending control commands or receiving live updates from sensors.
In our project, the WebSocket will enable the ESP32-S3 to receive JSON messages from the web interface to control the LED color dynamically. Let’s dive into setting up the WebSocket server on the ESP32-S3.
In the previous post, I defined the start_webserver() function to initialize the web server on the ESP32-S3. Within this function, I set up URI handlers to link resources or endpoints. Using the httpd_uri_t ws{...} structure, I linked the handler for the WebSocket, called handle_ws_req. You can see the code for it below.
static esp_err_t handle_ws_req(httpd_req_t *req){
    t_rgb_color pixel_to_queue;
    if (req->method == HTTP_GET){
        ESP_LOGI(TAG, "Handshake done, the new connection was opened");
        return ESP_OK;
    }
    httpd_ws_frame_t ws_pkt;
    uint8_t *buf = NULL;
    memset(&ws_pkt, 0, sizeof(httpd_ws_frame_t ));
    ws_pkt.type = HTTPD_WS_TYPE_TEXT;
    esp_err_t ret = httpd_ws_recv_frame(req, &ws_pkt, 0);
    if (ret != ESP_OK){
        ESP_LOGE(TAG, "httpd_ws_recv_frame failed to get frame len with %d", ret);
        return ret ;
    }
    if (ws_pkt.len){
        buf = calloc(1, ws_pkt.len + 1);
        if (buf == NULL){
            ESP_LOGE(TAG, "Failed to calloc memory for buf");
            return ESP_ERR_NO_MEM;
        }
        ws_pkt.payload = buf;
        ret = httpd_ws_recv_frame(req, &ws_pkt, ws_pkt.len);
        if (ret != ESP_OK){
            ESP_LOGE(TAG, "httpd_ws_recv_frame failed with %d", ret);
            free(buf);
            return ret;
        }
    	ESP_LOGI(TAG,"ws received packet lenght: %d",ws_pkt.len);
    	ESP_LOGI(TAG,"data: %s",ws_pkt.payload);
        xQueueSend(data_ws_in_queue,ws_pkt.payload,NULL);
        free(buf);
    }
    return ESP_OK;
}
The handle_ws_req function is responsible for handling WebSocket requests on the ESP32-S3. It first processes the WebSocket handshake when an HTTP_GET request is received, ensuring the connection is established. For incoming messages, it uses the httpd_ws_frame_t structure to receive and store the message payload. If the message contains data, the payload is dynamically allocated, logged, and then sent to a FreeRTOS queue (data_ws_in_queue) for further processing. The function handles errors, such as memory allocation failures or issues during frame reception, ensuring stability and proper resource management. It supports text-based WebSocket messages (HTTPD_WS_TYPE_TEXT).
Enhancing the Web Interface with WebSocket Support
In a browser, a WebSocket is managed using the WebSocket API, which provides a straightforward way to create and maintain a full-duplex connection with a server. Once the WebSocket is initialized by specifying the server’s URL, the browser handles the underlying connection setup and ensures the channel remains open for bidirectional communication.
The browser acts as the client in this system. Its role is twofold:
- Sending Data: It sends messages to the server, such as user inputs or control commands, in a format like JSON. This is particularly useful for real-time interactions where immediate feedback is required.
- Receiving Data: It listens for updates or responses from the server and handles them dynamically without requiring a page reload.
Additionally, the browser can monitor the WebSocket connection status using event handlers like onopen, onclose, and onerror. These allow the application to provide feedback to the user about the connection state, such as displaying “Connected” or “Disconnected” messages. In cases where the connection is lost, the browser can attempt to re-establish it automatically by implementing reconnection logic, ensuring a seamless user experience.
In our project, the browser is responsible for sending color data selected via the web interface’s color picker to the ESP32-S3 over the WebSocket. The data is sent as a JSON object. The browser also monitors the WebSocket connection, providing a reliable and interactive interface for controlling the LED color dynamically. Let’s look at how to implement this in JavaScript.
/*
* Add websocket
*/
var gateway =  `ws://${window.location.hostname}/ws`;
var websocket;
window.addEventListener('load', onLoad);
function initWebSocket() {
    console.log('Trying to open a WebSocket connection...');
    websocket = new WebSocket(gateway);
    websocket.onopen = onOpen;
    websocket.onclose = onClose;
    websocket.onerror = onError;
    websocket.onmessage = onMessage; //This event acts as a client's ear to the server. Whenever the server sends data, the onmessage event gets fired
}

function onOpen(event) {
	console.log('Connection opened');
}
function onClose(event) {
	console.log('Connection closed');
	setTimeout(initWebSocket, 2000);   //Try to reconnect every 2 seconds if the websocket disconnects
}
function onMessage(event) {
	console.log(event.data);
}
function onLoad(event) {
	initWebSocket();
}
function onError(event) {
	console.log('WS Error!');
}
Sending and Parsing JSON Messages
JSON (JavaScript Object Notation) is a lightweight, text-based format for structuring data, making it a popular choice for web-based communication. Unlike plain text, JSON provides a standardized way to organize complex data using key-value pairs, arrays, and nested objects. This structure allows for easier parsing and understanding of the data on both ends of the communication.
For our project, JSON offers several advantages:
- Human-Readable and Debuggable: The format is easy to read and understand, which makes debugging and testing simpler compared to raw, unstructured plain text.
- Versatile and Scalable: JSON can handle multiple fields in a single message. For example, in addition to the RGB values, you could include brightness or mode settings without changing the communication structure.
- Language-Agnostic: JSON is supported by almost every modern programming language, including JavaScript in the browser and C on the ESP32-S3, making it an ideal choice for cross-platform communication.
By using JSON, our WebSocket messages encapsulate not just the RGB color data but also provide a foundation for adding more features or parameters in the future. Let’s explore how we structure, send, and parse these JSON messages in our project.
function sendColorData() {
  if (!websocket || websocket.readyState !== WebSocket.OPEN) {
    console.error("WebSocket is not connected or not open.");
    return;
  }

  // Assuming colorPickerBottom.value contains a string like "#RRGGBB"
  const colorPickerValue = colorPickerBottom.value; // Example: "#FF5733"

  var r = 0; // Red
  var g = 0; // Green
  var b = 0; // Blue

  console.log("Poke state:", isOn);
  if (isOn === true){	//If false, turn off the LEDs
	// Extract RGB values from the hex color
	 r = parseInt(colorPickerValue.slice(1, 3), 16); // Red
	 g = parseInt(colorPickerValue.slice(3, 5), 16); // Green
	 b = parseInt(colorPickerValue.slice(5, 7), 16); // Blue
  }

  // Create the JSON structure
  const jsonData = {
    pixel: [
      {
        id: -1,
        R: r,
        G: g,
        B: b
      }
    ]
  };

  // Convert the JSON object to a string
  const jsonString = JSON.stringify(jsonData);

  // Send the JSON string over the WebSocket
  websocket.send(jsonString);

  console.log("Data sent over WebSocket:", jsonString);
}
When the function sendColorData() is called, a JSON structure for the color data is created based on the Pokeball’s state (ON/OFF) and the selected color. The JSON data structure also includes an id field, allowing you to target a specific LED.
In the next step, we’ll look at how to parse the JSON messages from the client. For now, here’s the logic I implemented:
- If the
idis-1, all LEDs are set to the same color. This means you can use a single message to update the color of the entire LED strip. - If the
idis a positive number, the RGB color specified in the JSON structure is applied to the corresponding LED.
Controlling the LEDs Based on WebSocket Messages
Let’s dive into the part of the code for the ESP32-S3 that parses incoming messages from the WebSocket and understand how it controls the LEDs.
The code is designed to receive JSON-formatted messages via a WebSocket and use the parsed data to dynamically update the LED strip. Here’s how it works:
- Receiving Messages
The ESP32-S3 listens for incoming WebSocket messages through a queue (data_ws_in_queue). When a message is received, it is processed and parsed into a JSON object. This enables the device to handle structured data efficiently. - Parsing the JSON Data
The JSON object contains an array named"pixel", where each element specifies the properties of an LED, including:
id: The ID of the target LED (or-1for all LEDs).R,G, andB: The red, green, and blue color values for the LED. The code loops through this array, extracting the color data for each specified LED and updating its state accordingly.
- Controlling the LEDs
- If the
idfield is-1, all LEDs in the strip are updated to the same color. - If a specific
idis provided, only that LED is updated. - The function
led_strip_set_pixelis used to assign colors to the LEDs, andled_strip_refreshsends the updated data to the strip, ensuring the changes are displayed immediately.
- Handling Missing or Invalid Data
If the JSON message is invalid or cannot be parsed, the code triggers a fallback behavior. This includes a pulsing animation with alternating colors, providing visual feedback that the device is still active but waiting for valid input. - Smooth Operation
A small delay (vTaskDelay) is added to the loop to maintain smooth operation and prevent excessive CPU usage, ensuring the system remains responsive.
This section of the firmware highlights how WebSocket messages can enable real-time interaction with an LED strip, offering a flexible and dynamic way to control lighting effects directly from a web interface.
if(xQueueReceive(data_ws_in_queue, s_json_from_queue, 0) != 0){
   dataIn = cJSON_Parse((char *)s_json_from_queue);
   if(dataIn != NULL){
   pixel_array = cJSON_GetObjectItem(dataIn ,"pixel");
   if(pixel_array!=NULL){
      int pixels_array_size = cJSON_GetArraySize(pixel_array);
      for(int pix_indx = 0; pix_indx < pixels_array_size ; pix_indx ++){
         cJSON *pixel = cJSON_GetArrayItem(pixel_array, pix_indx);
         if(pixel != NULL){
            int pix_id = cJSON_GetObjectItem(pixel,"id")->valueint;
	    pixel_from_queue.R_color = cJSON_GetObjectItem(pixel,"R")->valueint;
	    pixel_from_queue.G_color = cJSON_GetObjectItem(pixel,"G")->valueint;
	    pixel_from_queue.B_color = cJSON_GetObjectItem(pixel,"B")->valueint;
	    if(pix_id == -1){		//-1 for all leds turn same color
	      ESP_LOGI(TAG,"All LEDs same color");
	      for(int i = 0; i < 24; i++) {
	        led_strip_set_pixel(led_strip_bottom, i,  pixel_from_queue.R_color,
                pixel_from_queue.G_color,  pixel_from_queue.B_color);
	      }
	     }else{
	       led_strip_set_pixel(led_strip_bottom, pix_id, pixel_from_queue.R_color,
               pixel_from_queue.G_color, pixel_from_queue.B_color);
	     }
          }
        }
     }
     led_strip_refresh(led_strip_bottom);  // Send data to the strip
     vTaskDelay(pdMS_TO_TICKS(50));
     cJSON_Delete(dataIn);
}
Conclusion

Building a WiFi-controlled device using the ESP32-S3, complete with real-time interaction powered by WebSockets and JSON data, opens the door to countless possibilities for creative IoT applications. Through this series, you’ve learned how to establish a WiFi connection, serve a dynamic web page, and enable two-way communication between the ESP32-S3 and a browser interface.
Here are some project ideas that comes to mind using these capabilities:
- Smart Home Dashboard
Create a centralized web interface to control multiple devices like lights, fans, or sensors in a smart home. Use JSON to send commands and retrieve real-time data such as temperature, humidity, or device statuses. - Interactive LED Matrix Display
Expand the LED control project by integrating an LED matrix. Use WebSockets to stream animations, text, or images in real time. A browser-based interface can allow users to draw directly on the matrix or upload JSON-formatted designs. - Remote Sensor Network Monitor
Build a network of ESP32-S3 devices that collect environmental data, such as air quality or soil moisture, and send updates to a central dashboard via WebSocket. The browser interface can visualize data trends and trigger alerts. - IoT-Based Security System
Design a security system with motion sensors, cameras, or RFID readers connected to an ESP32-S3. Use WebSockets to send instant alerts and JSON to configure settings or retrieve logs through a web interface.
Happy building!

Thank you for reading and supporting my blog! If you enjoyed this content and would like to help me continue creating more, please consider leaving a donation. Your generosity will help me cover the costs of materials and tools for future projects. Any amount is greatly appreciated! And remember to follow me on Instagram for more updates and behind-the-scenes content.

